
Disconnect your car battery before installation.
Install:
To remove the factory panel, please follow the following video:
https://www.youtube.com/watch?v=kfoylK8gO_E
For SYNC retaining version:
ZF-1201X2A and ZF-1201X3A
Factory CD player does not need to be removed.
Do not change any of the AC settings.
If you have the Fusion that retains factory SYNC 2 and SYNC 3, remove the SYNC module behind the factory screen and put it on the new radio. Connect T harness between screen and its original harness. T harness will connect in between factory port and factory plugs.
Please also remove the factory AC circuit board:
The back of your face plat should look like this:

The screw points might be different for different model year. Remove the screws and you will see a green circuit board at the back. Put the circuit board to the back of new radio where there is a back cover to house it.
Connect the cable to the back of the new radio where you just put in the circuit board and reverse the steps to install it back.
Cable Management
Please put both cables on top of the OEM CD player, otherwise the display may not be able to fit onto the dash.
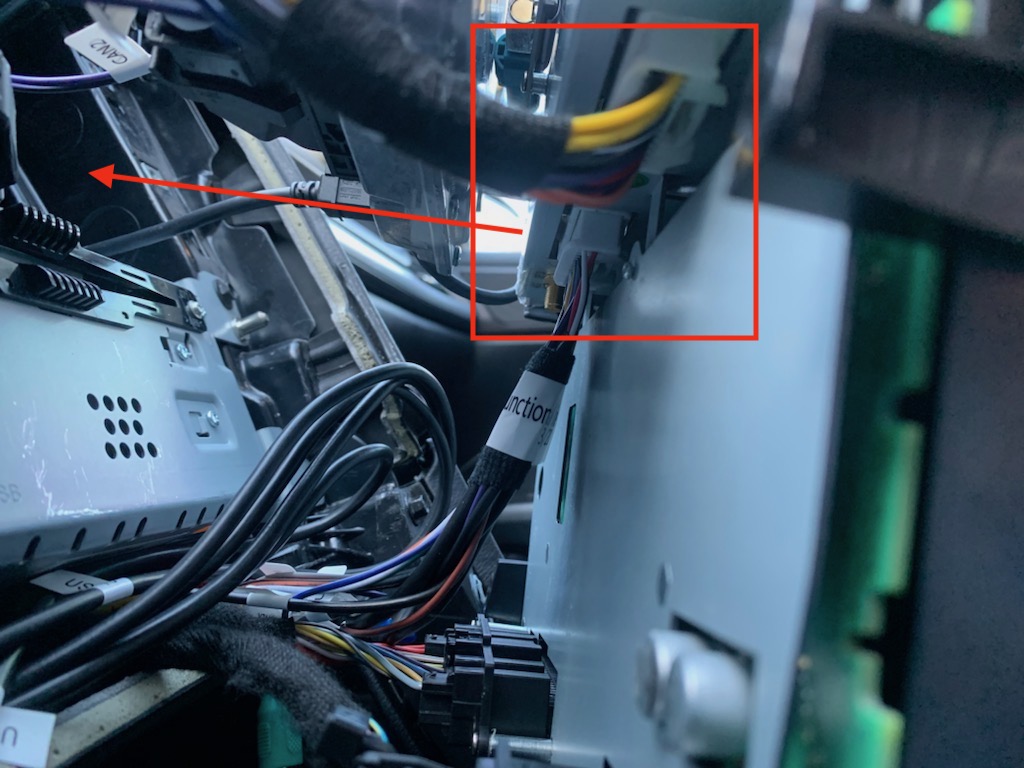
For Manual AC with 4" screen:
If you have regular radio that does not retain the SYNC, remove CD player and factory screen. Connect all matching harness.
The package comes with an AC board. It is a flat metal box with two black ports behind. Please connect the AC board to the factory matching connectors. The two black connectors used to connect to the factory panel will connect to the AC board. There is a small cable coming out of the AC board will connect to the main computer box, which is a bigger metal box.
Then connect the main harness to the vehicle. It will mainly connect to the other two black connectors that are used to connect to the factory CD player.
After that, connect the radio antenna adapter. Use the blue head to connect. The yellow connector is factory GPS antenna, which is left unused.
Behind the factory screen, there is a 12 pin connector. Connect that to backup camera adapter, which has a yellow male RCA on it. Connect the male RCA to a yellow female with tag "camera".
After that, connect Wi-Fi antenna, GPS antenna to the main computer of the unit. Connect the rest of the cable to the main computer box and also the screen.
Turn on the screen to test functions.
** Steering wheel control: make sure the factory screen adapter is connected then go to setting - wheel setting - choose low Z - pair the connections.
For Auto AC that does not retain SYNC:
If you have Auto AC with a regular radio, please remove the back cover of your factory panel. Transfer the circuit board from the factory radio to the back of new radio then connect all matching harness.
The back of your face plat should look like this:
The screw points might be different for different model year. Remove the screws and you will see a green circuit board at the back. Put the circuit board to the back of new radio where there is a back cover to house it.
After that, connect main harness to the factory connections. We will use the two factory CD player connectors for power, speaker, data and amp control. Then connect radio antenna adapter, USB adapter to the factory connection.
Plug in the adapters to the new radio's computer. Connect the screen interlink cable between computer and the screen.
Dont forget to connect the AC cable at the lower back of the screen where you put your factory AC board to.
Power up the unit and test for functions. For AC settings, please refer to below if your AC is not working. After verifying everything works, reverse the steps in the video to install the radio back.
AC should be set to Mondeo H with protocol as default. Refer to below for steps.
No Audio:
If your vehicle comes with factory amplifier, please find this connector on factory side:
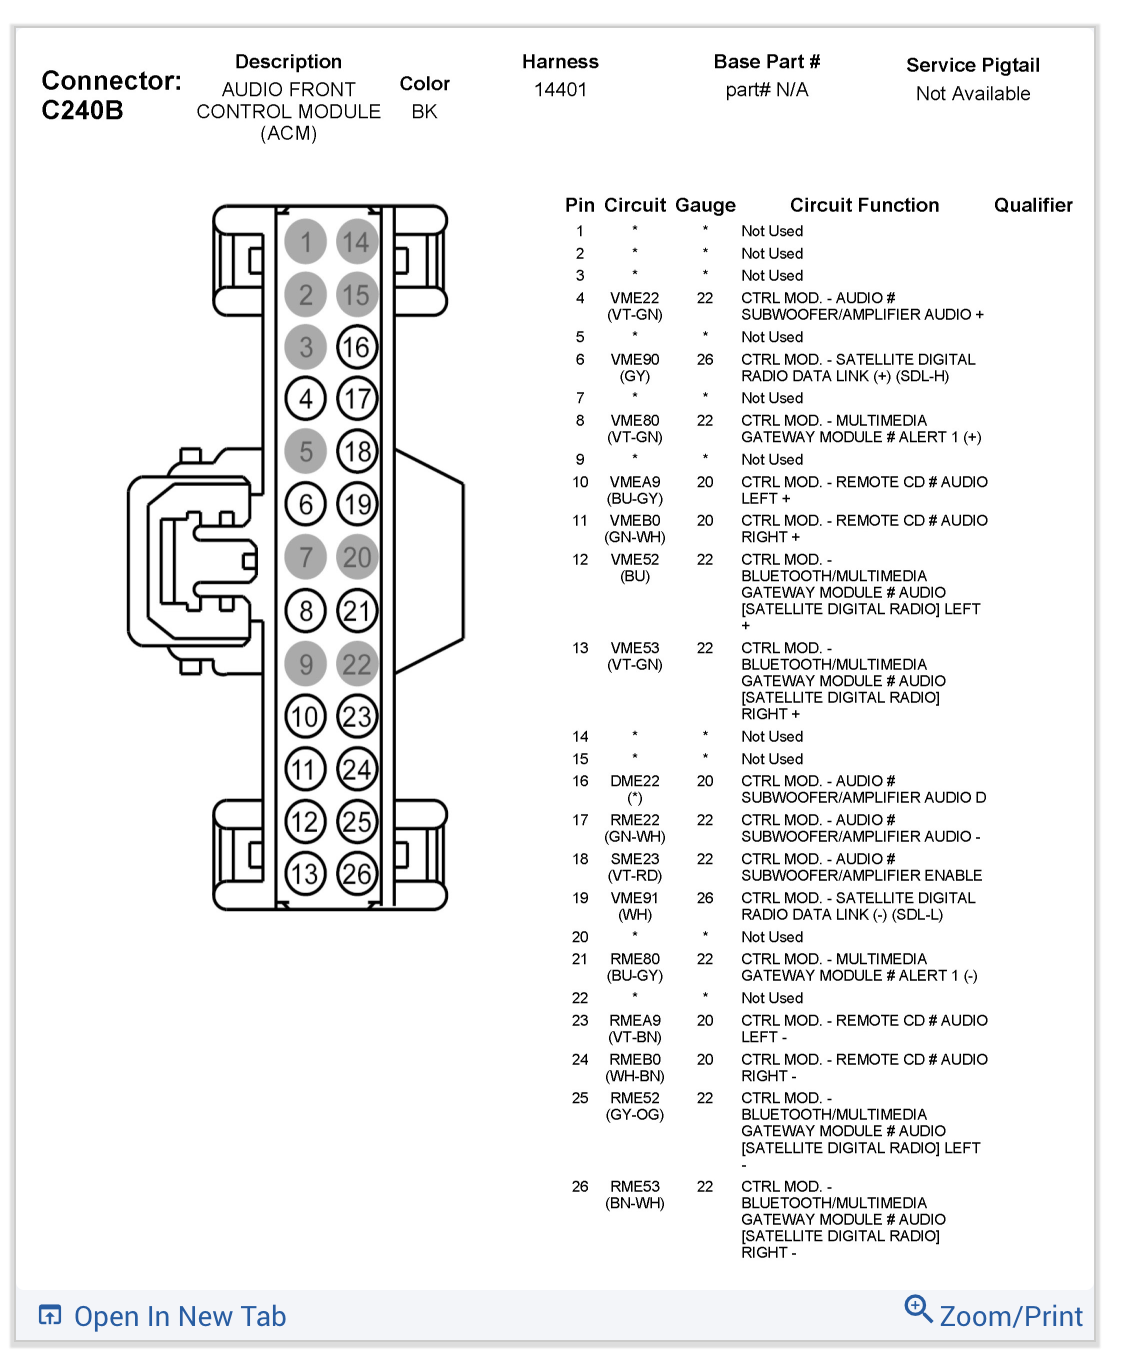
Please check voltage of PIN #18 against ground. You should get a reading between 3.5 - 8V. If not please supply 6V to this wire to enable sound on the unit.
Camera Wiring:
For factory 4.2" screen
If you received a large backup camera connector like below, but you have a small 12 pin connector behind your 4.2" screen. Remove these two wires and connect to pin 6 and 12 of factory connector.


If you received 4.2" connector and have a larger factory plug, reverse the steps. remove the two pins at 6 and 12, and put them on pin 14 and 15 on the larger connector:

Comments
0 comments
Please sign in to leave a comment.